Showing posts with label Recipe. Show all posts

Friday, 2 October 2015

Spicy tomato and roasted capsicum relish


After a relish to top your steak? Or to dip crackers into? I went on a quest to replicate a delicious store-bought relish earlier this year, and this was the result. A spicy, slightly acidic, slightly sweet, savoury tomato and capsicum relish. Certainly a healthier alternative to drowning your meat in tomato sauce (which I must admit I did as a kid, and well into teenage hood), and a much more natural, chunky, adult-tasting version.

I used some of the same techniques from my arrabbiata sauce recipe, blanching fresh tomatoes and roasting my own red capsicum. You certainly could make a few shortcuts and used canned chopped tomatoes and store-bought roasted capsicum if you were a little time-poor (and let's face it- who isn't?). But I think the real joy of this is being able to make the entire thing from scratch. Who knows, your homemade relish could become a nice little Christmas present for loved ones?


Spicy tomato and roasted capsicum relish

4 medium tomatoes
1 small-medium red capsicum
½ red onion, diced
1 small red chilli, finely chopped (or more if using larger, milder chillies)
2 cloves garlic
2 Tbsp red or white wine vinegar
1.5 Tbsp brown sugar
1 Tbsp extra virgin olive oil
1 tsp mixed herbs
Pinch of salt and pepper
  1. Roast capsicum: Place capsicum pieces skin side up on a baking tray lined with foil. Bake at 200°C for ~15 minutes, or until skin starts to darken. Gather up foil to enclose capsicum and steam in oven for a further 10 minutes. Remove capsicum from oven, place into a bowl of ice cold water for a couple of minutes. Remove from water and peel off skin. Discard skin and set aside.
  2. Blanch tomatoes: Prick the skin of the tomatoes a couple of times each and place in a medium-sized saucepan of water. Cover and bring to the boil for ~10 minutes or until cracks appear in the skin of the tomatoes. Drain and place in a bowl of ice cold water for a couple of minutes. Remove from water and peel off skin. Discard skin and set aside.
  3. Roughly chop capsicum and tomatoes, reserving only half the juices.
  4. Saute onion in olive oil in a medium saucepan until translucent. Add garlic and chilli and stir for 2 minutes.
  5. Add capsicum, tomatoes and juices, vinegar, brown sugar, herbs, salt and pepper to the saucepan. Simmer for at least 45 minutes, until relish has reduced and thickened.
  6. Place in a sterilized glass jar until and store until needed. Refrigerate after opening.

Makes ~300mL (just over 1 cup).

Note: to sterilize a jar, wash in hot soapy water, rinse and dry well. Place in the oven at 120°C for 20 minutes. Remove from oven and immediately fill with sauce.


Thursday, 16 July 2015

Dark chocolate mousse cake


It was my birthday last week. Yep, I turned the ripe old age of 24! (I can hear some of you scoffing from here). I find myself having to do all sorts of adult things like organising my tax return, freaking out about never being able to afford a house in Sydney and watching my school mates get engaged and have babies! But am I too old for cake? Never! This year I couldn't decide what type I wanted so I extended my birthday out to two weeks (the mature decision) and had lemon meringue pie one week and this dark chocolate mousse cake the next. Mmm 


This recipe was adapted from an Eating Well recipe for chocolate decadence cake, and decadent it certainly is! Yet it's light enough that it doesn't feel heaving and rich enough that a small piece satisfies- winner! Certainly still a sometimes cake which I reserve for celebrations, but a healthier version nonetheless.

Dark chocolate mousse cake

1 1/3C good quality 70% dark chocolate, finely chopped (I used 200g Lindt 70%)
1/3 C cocoa powder plus 1 Tbsp extra
2 Tbsp plain flour
¼ C plus ¼ C castor sugar, separated
1 C skim milk
1 tsp vanilla extract
2 large eggs, separated, plus 1 extra egg white

  1.  Preheat oven to 180°C and line the bottom and sides of a 20cm cake tin with baking paper.
  2. Place chocolate and cocoa powder in a large bowl.
  3. Combine flour and ¼ C sugar in a small saucepan. Whisk in just enough milk to form a smooth paste. Mix in remaining milk.
  4. Cook milk and flour mixture over medium heat, stirring constantly to prevent burning until the mixture begins to bubble. Boil gently for 2-2.5 minutes until the mixture gets very thick and then thins just slightly as the starch cooks.
  5. Stir the hot milk and flour mixture into the chocolate and cocoa until chocolate is completely melted and mixture is smooth, thick batter.
  6. Stir in the 2 egg yolks and vanilla.
  7. In a separate bowl, beat egg whites with electric beaters until soft peaks form. Gradually add the remaining ¼ C of sugar, beating until peaks become stiff.
  8. Gently fold a quarter of the egg whites into the chocolate mixture. Gradually add remaining egg whites, gently folding until no white streaks remain but batter is still light and airy.
  9. Pour batter into the cake tin and place tin in a larger, deep baking tray. Pour boiling water into the tray until water comes a third to halfway up the side of the cake tin.
  10. Bake for 20-25 minutes or until the cake springs back when gently pressed.
  11. Remove from oven, and cool completely in tin on a wire rack. Cover with glad wrap and refrigerate overnight.
  12. Remove cake from tin and cut into 12 slices using a large knife, dipped into a glass of hot water between cuts (as cake will stick). Dust with extra tablespoon of cocoa powder and serve with strawberries if desired. Keep refrigerated.

Makes 12 slices


Saturday, 13 June 2015

'Raw' choc hazelnut cups


Raw, gluten free, dairy free, sugar free treats are blowing up on Instagram and all sorts of social media at the moment. And while I don't agree that these types of restrictions are a necessary part of a healthy (or any) diet, these certainly do taste good! And sometimes you need a sweet, pick-me-up treat that makes you feel as good as it tastes when you eat it. I experimented with a bliss ball recipe and some mini muffin trays to make these, and the only real requirement is strong hands for pressing the mixture into shape!

'Raw' choc hazelnut cups

2 C almond meal
3 heaped Tbsp cocoa
1 ½ C dried pitted dates
¾ C desiccated coconut
1 tsp vanilla essence
Approx. ¼ C Mayver’s Almond, Coconut & Cacao Spread (or equivalent nut cocoa spread with no added sugar, fat or salt)
Hazelnuts to top


  1. Combine almond meal, cocoa, dates, coconut and vanilla in a food processor and blend to a fine crumb that holds its shape when squeezed together (at least 5 minutes, to allow the natural oils to be released from the almond meal).
  2. Line a mini muffin tin tray with glad wrap. Spoon 1 heaped Tbsp of mixture into each hole and press down firmly with the back of a teaspoon. Use this to also make a small hollow in the centre of each cup. Refrigerate for at least 5 minutes and repeat with mini muffin trays until all the mixture has been used up. Note: you can remove cups from the first mini muffin pan to use again for remaining mixture if you only have the one tray.
  3. Remove cups from their mini muffin trays simply by lifting up the glad wrap. Fill the hollow of each chocolate cup with ½ a teaspoon of cocoa nut spread and top with a whole hazelnut.
  4. These cups can be refrigerated in an air-tight container, or stored in the pantry if the weather is not too hot.

Makes ~32 ‘cups’.


Monday, 8 June 2015

Banana Muffins


Banana muffins are one of those baked goods I think we all have a recipe for, hidden somewhere amongst the recipe books. They're a great way to use up over-ripe bananas, make a delicious lunch box snack or mid-afternoon treat, and the smell that fills your kitchen while they're baking is like nothing else!

I thought I'd share with you my favourite healthy banana muffin recipe, adapted from the millions that are out there, to form the only one you'll ever need…


Banana Muffins

½ C rolled oats
1 ¾ C wholemeal SR flour
½ tsp bicarb soda
1 tsp cinnamon
1 tsp vanilla essence
2 ripe bananas, mashed
½ C plain yoghurt
¼ C macadamia oil
¼ C honey
2 eggs
To top:
12 extra banana slices
1 Tbsp brown sugar (optional)
  1.  Preheat oven to 180C fan forced.
  2. Whisk eggs, oil, yoghurt, honey and vanilla in a medium bowl. Stir in banana.
  3. In a separate bowl combine flour, oats, bicarb soda and cinnamon.
  4. Add dry mix to wet mix and stir until just combined.
  5. Pour into muffin tin lines with 12 muffin cases. Top each with 1 slice banana and a sprinkle of brown sugar (if using).
  6. Bake for ~20 minutes or until golden brown and a skewer comes out clean. 

Makes 12

Tuesday, 12 May 2015

Healthy fried rice


Ahh fried rice. The dish everyone gets Chinese takeaway for, right? Well, despite the 'fried' in the title, it doesn't have to be unhealthy and can certainly make for a balanced mid-week meal. How you ask? Well, by a few simple swaps:
  • White rice for brown rice (using the microwave version makes it even faster)
  • Bacon for lean ham
  • Regular soy sauce for reduced salt soy sauce
  • Excess vegetable oil for a smaller amount of olive oil
  • Extra veg!

Quick and healthy fried rice

2 C cooked brown rice
4 eggs, lightly beaten
8 thin slices lean ham, diced
2 Tbsp reduced salt soy sauce
1 tsp minced ginger
1 tsp minced garlic
1 brown onion, finely diced (or 1/2 bunch spring onions, white parts sautéed at start and green parts added to garnish at the end)
4 C finely chopped vegetables (I used beans, carrots and mushrooms, but you could also add peas, broccoli, zucchini, capsicum, etc)

  1. Pour beaten egg into a large frypan sprayed with a little olive oil and spread out to form a thin omelette. Cook over a medium heat until cooked through, flipping once. Remove from pan and cover with foil to keep warm.
  2. Saute onion in the same pan with another spray of olive oil until translucent. Add garlic, ginger and ham and cook, stirring for 1 minute. Add vegetables and cook over medium heat until just soft.
  3. Add cooked rice and soy sauce to pan, stirring until mixed well. Divide among 4 bowls. 
  4. Meanwhile, roll omelette and slice into 1cm thick scrolls. Place 1/4 of the egg scrolls onto each bowl of fried rice.
Serves 4


Saturday, 25 April 2015

Baked apples with an oaty crumble stuffing


It's getting to that time of year again where I crave warming wholesome desserts. And while traditional apple crumble may be a little heavy handed on the sugar and butter and a little lacking on the apples, these baked apple crumbles are anything but. Individual half apples, baked, with an oat and almond crumble filling piled high and served with my low sugar creamy vanilla custard (see my profiterole post for the recipe), these are full of fibre and protein and are 1/2 a serve of fruit each. 

Note: you can prepare the crumble filling ahead of time, but once baked, these are best eaten straight out of the oven!


Baked apples with an oaty crumble stuffing

3 green or red apples, halved horizontally with the core scooped out
Juice of 2 lemons
¾ C rolled oats
½ C almond meal
¼ C plain wholemeal flour
1 Tbsp brown sugar
1 Tbsp linseeds
1 heaped Tbsp chopped almonds
1 tsp cinnamon
3 Tbsp butter/margarine 
  1. Preheat oven to 180°C.
  2. Drizzle cut apple surfaces with lemon juice to prevent them turning brown. Place into a baking dish with 2cm of water and set aside.
  3. Combine oats, almond meal, wholemeal flour, brown sugar, linseeds, chopped almonds and cinnamon in a medium bowl. Add butter/margarine and rub with your fingertips to form a crumble.
  4. Divide crumble mixture amongst apple halves, spooning into hole and piling up on top. You may have to press the mixture down so it all fits and doesn’t just fall off.
  5. Bake apples for 30 minutes or until apples are soft and crumble is golden brown.
  6. Serve with custard or ice-cream.
      Serves 6.

Thursday, 9 April 2015

Ginger-lime chicken lettuce wraps with coconut rice noodles


When I was in Hawaii earlier this year I had this great meal. So fresh, so light, and so flavoursome! It was like a version of tacos (just as messy too!) but using Asian inspired flavours: ginger, lime, chilli and coconut. And of course I had to recreate it. 

Rice noodles are great because they cook quickly, but they also take on whatever flavour you cook them in, which is why cooking them in coconut milk really gave them a life of their own. I served these with the chicken and rice noodles hot, which is a good contrast to the cold bean sprouts, carrot and of course lettuce! The dipping sauce adds some spice and is based on a Donna Hay dipping sauce recipe (but with a lot less sugar!). Enjoy sharing this one for your next family meal...


Ginger-lime chicken lettuce wraps with coconut rice noodles

1 cos lettuce, leaves rinsed and separated
125g rice noodles
375g tin coconut milk or coconut flavoured evaporated milk
1 C water
2 chicken breasts, cut in half horizontally
2 tsp minced ginger
2 tsp minced garlic
Juice of 1 lime
2 large handfuls bean sprouts
2 medium carrots, grated or finely sliced

Chilli and ginger dipping sauce:
1 thumb-sized piece of ginger, peeled and shredded
1 long red chilli, deseeded and shredded
1 Tbsp fish sauce
2 Tbsp castor sugar
1/3 C water

  1.  Combine minced ginger, garlic and lime juice in a large non-metallic bowl. Add chicken breasts and toss to coat. Cover with cling film and put in the fridge to marinate for 2-3 hours.
  2.  Make dipping sauce: add all ingredients into a small saucepan and place over medium heat, stirring, for 3-5 minutes, until sugar is dissolved and the flavour of the chilli and ginger permeates through the sauce. Refrigerate until needed.
  3.  Cook chicken in a large frypan over medium-high heat until golden brown and cooked through. Remove from pan and slice into thin strips.
  4.  Meanwhile, heat coconut milk and water in a medium saucepan until just boiled, add rice noodles and reduce to a simmer for 5 minutes or until noodles are cooked. Drain.
  5.  Serve lettuce leaves with grated carrot, bean sprouts, coconut rice noodles and marinated chicken, to roll into wraps and dip into dipping sauce.

Serves 4 (3-4 'wraps' each).

Saturday, 14 March 2015

Chickpea Blondies with White Choc Chips & Macadamias


I recently discovered the wonders of chickpeas in baking. They're an unlikely substitute for flour but somehow they just work! And the benefits? Well they instantly increase the fibre and protein content of any recipe, not to mention adding in some sneaky vegetable serves! This recipe isn't new, you will find variations floating all over the internet, mostly using normal choc chips and nothing else. But I wanted to go more down the traditional route: blondies are meant to contain white chocolate. And macadamias and white chocolate are just a match made in heaven. 

These blondies are crispy and crumbly on the outside and soft and moist on the inside. The recipe is flour less, full of healthy fats (thanks to the nut and seed butter) and can be made gluten free by choosing gluten free baking powder. And they passed my boyfriend's taste test (who is usually anti-healthifying recipes)! Which, trust me, says it all. So go ahead and try these, I will certainly be making them again (and doing some more experimenting with legumes in baking)!


Chickpea blondies with white choc chips and macadamias

400g can chickpeas, drained, rinsed and patted dry with paper towel
1/2 C nut butter (I used Mayver's Original Super Spread but your favourite nut &/or seed spread will work fine)
1/4 C brown sugar (can be substituted for honey)
1 tsp vanilla essence
1/4 tsp baking powder
1/4 tsp bicarb soda
1/2 C white choc chips
1/3 C macadamias, chopped
Splash of water (~3 Tbsp)

1. Preheat oven to 175°C and line a loaf tin with baking paper.
2. Blend all ingredients, except the white choc chips and macadamias, in a food processor until smooth. It should make a thick hummus-like consistency.
3. Stir in the choc chips and 3/4 of the macadamias and pour into the loaf tin. Smooth top with the back of a spoon and sprinkle with remaining macadamias.
4. Bake for ~50mins or until a skewer comes out clean and the edges begin to brown. Cool in tin for 5 minutes before removing to cool completely on a wire rack. Cut into squares and enjoy!


Friday, 27 February 2015

Ricotta Gnocchi


I've said before on this blog how much I love Italian food and this recipe is no different. I had only ever known of potato gnocchi (which didn't overly excite me), but after some particularly good ricotta gnocchi in a restaurant, I knew I had to recreate this type! Based on a Margaret Fulton recipe, these gnocchi are so easy to make. They take less than 15 minutes to mix and roll and only 5 minutes to cook! Talk about speedy cooking. You can also make up a bigger batch and freeze some for later.

I served mine with my homemade arrabbiata sauce and a large garden salad, but you can certainly experiment with that. These gnocchi can be served 'as is' after being boiled or they can then be pan-fried in a little olive oil until golden- both ways are delicious.

Ricotta Gnocchi

250g reduced fat fresh ricotta
1/3 C grated parmesan
1 large egg, lightly beaten
½-¾ C plain flour
 
  1. Combine the ricotta, parmesan and egg in a medium sized bowl. 
  2. Add the flour and mix lightly until just combined. Add only as much flour as you need to make a workable dough.
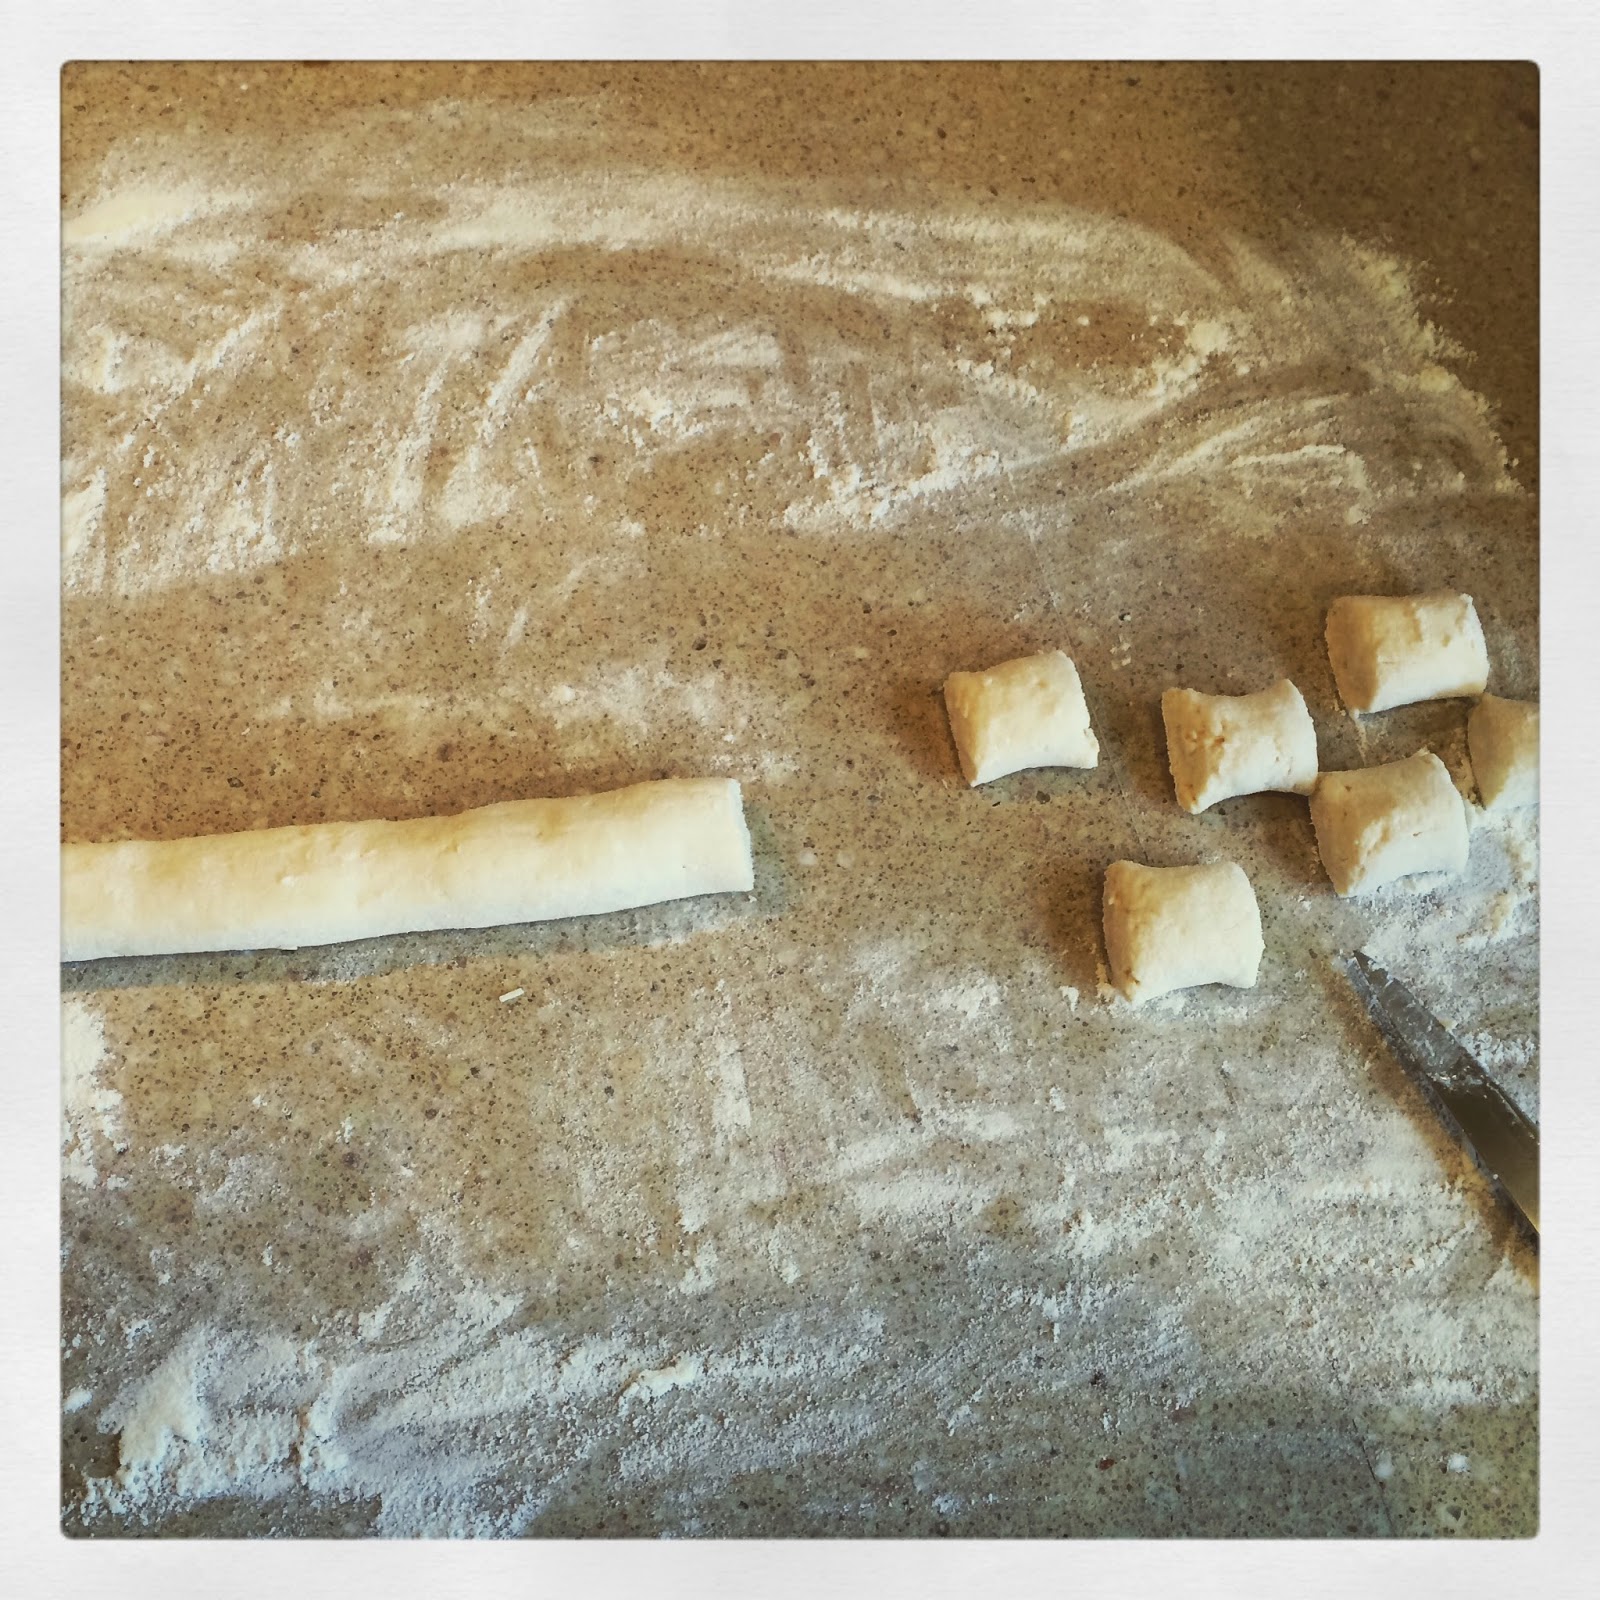
  3. Divide the dough in three and roll each piece into a 2-3cm thick log (depending on how small or large you like your gnocchi). Cut 2-3cm slices and place on a lightly floured baking sheet. Refrigerate if not using immediately.
  4. Bring a large saucepan of water to the boil, then reduce heat to simmer. Cook gnocchi by dropping them into the saucepan and removing then when they float to the surface (after ~5mins) as this means they’re cooked.
  5. Optional: Pat gnocchi dry with paper towel and add to a frypan over medium heat with a little olive oil. Toss until lightly golden on each side. Remove and serve.
          Serves 3.


Friday, 20 February 2015

Profiteroles


Profiteroles. Delicious choux pastry filled with creamy custard and topped with rich chocolate. Yep, I have a recipe for that. It's not that hard either! I promise you'll feel like a Masterchef when you present these babies to your family and friends (and they'll love it too). 

So, yes, these are a treat, but they have been adapted to make them a healthier version than most of the other recipes you'll find. And I challenge you to try them and not like them!


Profiteroles

¼ C margarine or butter
½ C water
½ C plain flour
2 eggs, lightly beaten
50g dark chocolate, broken into pieces, melted

Vanilla custard:
1 ¼ C reduced fat milk
½ tsp vanilla bean paste
2 egg yolks
1 heaped Tbsp castor sugar
1 heaped Tbsp cornflour
  1. Make custard: Heat milk and vanilla in a small saucepan over high heat and allow to just come to the boil. Remove from heat. In a medium sized bowl, beat egg yolks and sugar until well combined. Pour the hot milk over the egg yolk mixture, whisking continuously. Once mixed in, return to the saucepan over low heat. Mix cornflour with a small amount of water to form a thin paste. Pour slowly into the saucepan, stirring continuously until thickened. Refrigerate.
  2. Preheat oven to 200°C and line a baking tray with baking paper.
  3. Make choux pastry: Place margarine/butter and water in a medium saucepan and bring to the boil. Once boiling, add flour and stir vigorously for 30 seconds or until mixture comes away from the sides of the pan. Transfer mixture to a medium sized bowl and beat with electric beaters for 1 minute or until mixture resembles large breadcrumbs and has cooled slightly. Slowly add eggs as mixture thickens, beating until well combined. Drop tablespoons of mixture onto baking tray and bake for 25 minutes or until puffed and golden.
  4. Pierce a small hole in the side of each profiterole with a skewer and allow to cool in the oven with the oven off and the door slightly ajar (around 45 minutes).
  5. Cut each profiterole in half horizontally and fill base with custard (or cut a small slit and pipe in custard with a piping bag). Replace tops and drizzle profiteroles with a teaspoon each of melted chocolate.
  6. Allow to set and store in the fridge. 
Makes ~12

Friday, 6 February 2015

Arrabbiata sauce from scratch


I don't know what you did in the recent holiday period, but I got my cook on. Cooking is one of those things that I love filling my spare time with, and lucky for me I actually cook all day long for one of my jobs (paid to do what you love? Winning!).

So here is one of my holiday period trials (don't worry, there will be plenty more filtering through over the coming weeks and months): home-made arrabbiata sauce- you know, the spicy tomato one that goes perfectly with pasta? I actually used mine to top my pan-fried ricotta gnocchi (recipe coming soon). It was a lot of fun! And so delicious. And I can imagine myself making big batches of this with the Italian Nonna I don't have and putting it into jars for all the family to last for months…

Yea ok, so I'm not Italian. But I do love pasta! And together with this sauce, they make the perfect pair. Best of all, you know exactly what's going into it and it's nothing but fresh ingredients.

A note to the cooks: I kept mine chunky, but you could whiz it up with a stick blender if you like a smoother consistency. And alter the amount of chilli depending on your taste for spice. This batch was medium in heat, but you could make it hotter with more chillies, or milder by taking out the seeds and white pith of the chilli (the hottest part).


Arrabbiata Sauce

6 medium tomatoes
1 medium red capsicum, deseeded and cut into quarters
½ brown onion, diced
1 small red chilli, finely chopped (or more if using larger, milder chillies)
2 cloves garlic, finely chopped (or minced)
1 tsp oregano
Small pinch salt and pepper
  1. Roast capsicum: Place capsicum pieces skin side up on a baking tray lined with foil, along with whole garlic cloves. Bake at 200°C for ~15 minutes, or until skin starts to blacken. Gather up foil to enclose the capsicum (like a little parcel) and steam in the oven for a further 10 minutes. Remove capsicum from oven and place immediately into a bowl of ice cold water for a couple of minutes to blanch. Remove from water and peel off skin. Discard skin and set capsicum aside to cool slightly.
  2. Blanch tomatoes: Prick the skin of the tomatoes a couple of times each and place in a medium-sized saucepan of water. Cover and bring to the boil for ~10 minutes or until cracks appear in the skin of the tomatoes. Drain and place tomatoes in a bowl of ice cold water for a couple of minutes to blanch. Remove from water and peel off skin. Discard skin and set aside to cool slightly.
  3. Roughly chop capsicum and tomatoes, reserving the juices.
  4. Sauté onion in a little olive oil in a medium saucepan until translucent. Add garlic and chilli and stir for 1 minute.
  5. Add capsicum, tomatoes and juices, oregano, salt and pepper to the saucepan. Stir and simmer for at least half an hour, until sauce has reduced and thickened slightly.
  6. If not using within a couple of days, place in a sterilised glass jar until needed.

Makes ~ 400mL or nearly 2 cups. Serves 4.


Note: to sterilise a jar, wash in hot soapy water, rinse and dry well. Place in the oven at 120°C for 20 minutes. Remove from oven and immediately fill with sauce.

Saturday, 3 January 2015

Raspberry swirl yoghurt bark


Sydney has been ramping up the heat this Summer and I've been searching for refreshing foods and drinks to cool me down. While ice-creams and ice-blocks are delicious (and I certainly do enjoy them from time to time), sometimes you're after more of an everyday healthy treat. This certainly delivers on both counts.

I've seen recipes for yoghurt bark floating around on the internet and thought, what a great idea! You really can use any type of yoghurt and top it with just about anything- nuts, seeds, fruit, coconut, mint, lemon, etc. Get creative with it! Here's the basic recipe for raspberry swirl yoghurt bark, but you could always just top it with whole raspberries (or any other fruit) instead.


Raspberry swirl yoghurt bark 

300-400g reduced fat plain Greek yoghurt (e.g. 2x tubs Chobani)
½ C frozen raspberries
3 Tbsp boiling water
2 tsp honey
Toppings:
Flaked almonds
Coconut flakes
Chopped mint

  1.       Blend raspberries, water and honey until smooth.
  2.       Pour yoghurt into a bowl and swirl through a third of the raspberry mixture.
  3.       Pour onto a tray lined with baking paper and spread out evenly until 0.5-1cm thick.
  4.       Drizzle over some more of the raspberry mixture (you probably won’t need it all but make sure you save it for a later use!) and sprinkle over toppings.
  5.       Freeze for a few hours or until hard. Break into pieces (‘bark’) and store in a snap lock bag in the freezer.


Saturday, 13 December 2014

Basic Roast Vegetable Frittata


Eggs are such a versatile protein: you can boil, poach, scramble, fry, whisk, beat or bake them. Not to mention the countless dishes that couldn't work without the powers of egg. Here is a basic recipe for a roast vegetable frittata that could be altered in many ways to work as a great easy lunch or dinner with a simple salad on the side. 

You could add:
- fresh herbs e.g. rosemary, thyme, parsley, basil
- garlic (try roasting on the tray with the veg then just mashing)
- a different cheese e.g. fetta, ricotta
- a different mix of veg e.g. asparagus, grated zucchini, carrot, parsnip, etc
- change the size/shape e.g. make them in a muffin tin and these mini frittatas would be great for school or work lunches (in an insulated lunch box of course!)
- Line the base of a round flan tin with a few layers of filo pastry before pouring in the veg and egg filling and make a quiche


Basic Roast Vegetable Frittata

1 medium potato, peeled and diced into small cubes
Equivalent sized piece of pumpkin, peeled and diced into small cubes
½ red capsicum, cut into small wedges
¼ red onion, cut into small wedges
1/3 C cooked, finely chopped spinach (e.g. from 2 frozen cubes)
4 eggs
½ C skim milk
1 tsp mixed herbs
1 heaped Tbsp plain flour
2 Tbsp grated parmesan
Salt to taste
¼ C cherry tomatoes, halved
To serve:
Large garden salad
  1.     Preheat oven to 180°C and place potato, pumpkin, capsicum and onion on a lined baking tray and spray with a little extra virgin olive oil. Bake for around 20 minutes or until cooked through. Leave oven on.
  2.     Whisk eggs, milk, garlic, herbs, flour, parmesan and salt in a medium sized bowl or jug.
  3.     Spread baked vegetables and spinach on the bottom of a 20cm square baking tray, lined with baking paper. Pour over egg mixture and sprinkle with tomatoes (halved side up).
  4.     Bake for around 25 minutes or until cooked through and golden. Serve with salad

Serves 4